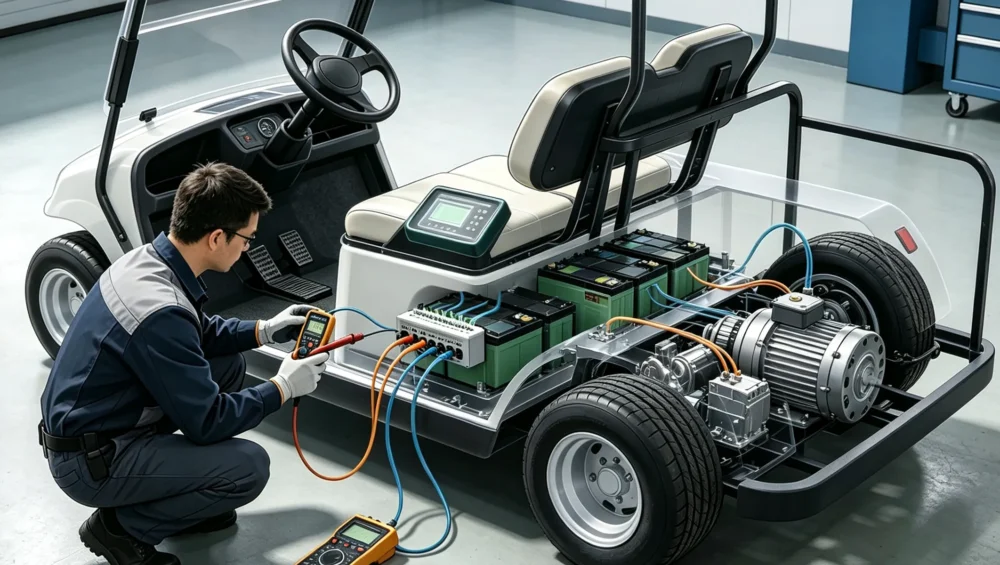
If your golf cart experiences issues such as inability to start, slow acceleration response, overheating during full load climbing, or overheating of the controller and motor, and you are unsure where the problem lies, you will seek professional assistance from nearby dealers and repair shops to troubleshoot.
In this article, I will teach you how to use a multimeter to quickly detect components such as the golf cart controller, battery, contactor, and throttle signal, determine the specific fault location, and provide specific solutions (repair or upgrade) to avoid unnecessary maintenance and time costs.
Why do we Need to Test the Golf Cart Controller?
As the core component of the entire vehicle, the golf cart controller is responsible for receiving throttle signals, adjusting PWM outputs, transmitting current to the motor, controlling motor speed, and controlling the forward/backward movement of the golf cart.
If the controller malfunctions, it may experience issues such as inability to start, overheating of the controller, jerking acceleration during start-up, and error codes. Therefore, it is necessary to use a multimeter to detect the controller in a timely manner.
What are the Typical Symptoms of a Controller Before it is Damaged?
Power aspect
- Start shaking
- Slow acceleration response
- Power attenuation
- Unable to climb uphill with full load
- Unable to start
- Sudden stop during driving
electrical aspects
- Controller overheating
- The fuse is burnt out
- Contactor error reported
Regarding batteries
- The battery consumes power abnormally quickly
- Decreased battery life
What Tools Need to be Prepared Before Testing?
Digital multimeter (essential): used to detect voltage, resistance, etc.
Insulated gloves: The purpose is to ensure safety during operation.
Vehicle route map (suggestion): Generally, vehicles are provided with a route map when they leave the factory, which facilitates you to quickly and accurately find the route.
Screwdriver: convenient for disassembling the controller cover plate.
How to Use a Multimeter to Check the Controller of a Golf Cart?
Firstly, check the battery voltage
Check whether the total voltage is normal and whether the individual batteries are consistent. For example, the normal voltage of a 72V system is between 74-76V. If it is lower than the normal range, it indicates that the battery has a problem and needs to be repaired in a timely manner.
Next, check the input voltage of the controller
After opening the key, measure whether the controller can receive voltage. If not, check the contactor, battery circuit connectors, etc.
Then check the contactor
Can you hear a ‘Click’ sound when lightly pressing the accelerator. Measure the input and output terminals of the contactor again. If there is power in the input and no power in the output, it indicates that the contactor may be damaged.
Re check the throttle signal
Lightly step on the accelerator and observe if the signal is stable. If the signal is not stable, it indicates a throttle malfunction.
Finally, check the output voltage of the controller
Lightly step on the accelerator and observe whether the output voltage of the controller increases with the throttle? If the controller is functioning properly, the voltage will continue to increase. If the controller is abnormal and there is no response from the voltage, it indicates that the controller is damaged.
Common Detection Errors
- Most users detect problems with the output voltage of the controller and simply replace it without considering detecting the battery, believing that both the battery and voltage cannot be damaged at the same time. This is a point that most people tend to overlook.
- It didn’t take long for the controller to test the output current, and that’s because you didn’t step on the accelerator. The controller won’t have any current when it’s stationary.
- Even if you hear the “Click” sound of the contactor, it does not mean that everything is normal.
- The positive and negative terminals of the multimeter are reversed.
Under What Circumstances Should the Controller be Replaced?
It is usually recommended to replace or upgrade the controller in the following situations:
- Internal MOSFET burnt out
- The controller has no output current
- Long term overheating
- Parameter damage cannot be restored
- Unable to match lithium battery anymore
FAQ
Does the controller not output necessarily mean it’s broken?
not always. The controller is not outputting, which may be caused by insufficient battery voltage, contactor not being engaged, abnormal throttle signal, damaged fuse or poor circuit contact. It is recommended to first use a multimeter to check the battery voltage, contactor, throttle signal, and controller input voltage before determining whether the controller is truly damaged.
What is the difference between a contactor and a controller?
Solenoid is mainly responsible for connecting or disconnecting the high current circuit between the battery and the controller, which is equivalent to the “power switch” of the vehicle; The controller is responsible for receiving throttle signals, adjusting output current and voltage, controlling motor speed, torque, and vehicle forward and backward directions, and is the “brain” of the entire vehicle power system.
Why is the controller overheating severely?
Controller heating is usually caused by long-term high current output, frequent ramp up, full load operation, poor heat dissipation, or aging of internal components. In addition, excessive motor load, unreasonable parameter settings, and abnormal battery voltage can also increase the heat generation of the controller. Continuous high temperature operation will shorten the lifespan of the controller, so it is necessary to check the heat dissipation and system matching in a timely manner.
How to detect a 48V controller?
When testing a 48V controller, a digital multimeter can be used to sequentially check the total battery voltage, controller input voltage (B+, B -), contactor output voltage, throttle signal, and controller output terminal voltage. If the input voltage is normal, but the controller does not output voltage after pressing the accelerator, it indicates that the controller may have a fault. It is recommended to rule out battery, circuit, and contactor issues before testing.
Is the PMSM controller detection method the same?
The basic testing process is the same, which requires checking the power input, battery voltage, contactor, and throttle signal. However, PMSM (permanent magnet synchronous) controllers usually use CAN communication or encoder feedback control, with more complex internal algorithms. In addition to multimeter detection, they can also read fault codes, operating parameters, and real-time data through dedicated debugging software to more accurately determine the cause of faults.
Do I need to reprogram after replacing the controller?
In most cases, it is necessary. The control parameters corresponding to different brands, vehicle models, motor types, and battery systems are not the same. After replacing the controller, parameters such as current limit, maximum speed, acceleration curve, and regenerative braking should be reset according to the vehicle configuration to ensure vehicle performance and safety. The SPIDERWAY PMSM PRO controller supports parameter programming and can be optimized and tuned according to different vehicle models and customer needs, fully leveraging the vehicle’s power and range performance.